
How to Beat Locus of Wailing Grief in Destiny 2: Warlord’s Ruin
The Locus of Wailing Grief is the second boss in Destiny 2’s Warlord’s Ruin and it builds upon the mechanics of the previous boss encounter. In this guide, I will walk you through how to defeat the Locus of Wailing Grief and share some pro tips to help you succeed.
How to Defeat Locus of Wailing Grief
First, you’ll need to shoot and destroy all six Blighted Eyes hovering over the middle of the stage. It is advisable to stay at the front of the stage throughout the encounter to avoid the overwhelming Taken adds below.
Once the Blighted Eyes are destroyed, yellow bar enemies will spawn on the left and right sides of the stage. As a Fireteam, it’s important to work together to take down these enemies. I suggest focusing on one side to ensure your damage is concentrated.

Another important tip is to wait for the yellow bar enemy to spawn a Taken Totem and then quickly defeat them. Additionally, make sure to defeat the yellow bar enemy close to a torch, as you will gain stacks of Biting Cold during this phase, which can be cleared by standing near one of the flaming torches at the front of the arena.
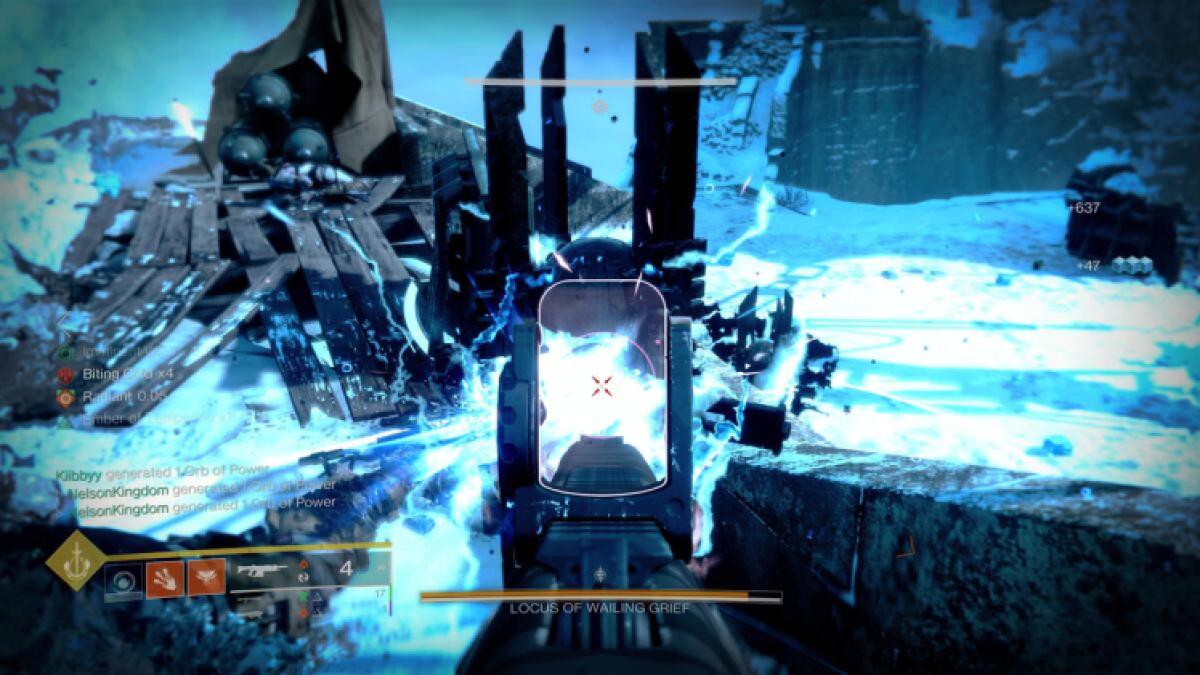
During the Imminent Wish countdown, similar to the Rathil encounter, you’ll have around 30 seconds to balance managing Biting Cold and defeating the black orb in a Taken Totem. It is highly recommended to defeat two Taken Totems to acquire two Solar Charges, which will speed up the boss encounter.
Dealing Damage to Locus of Wailing Grief

Image: PC Invasion Image: PC Invasion
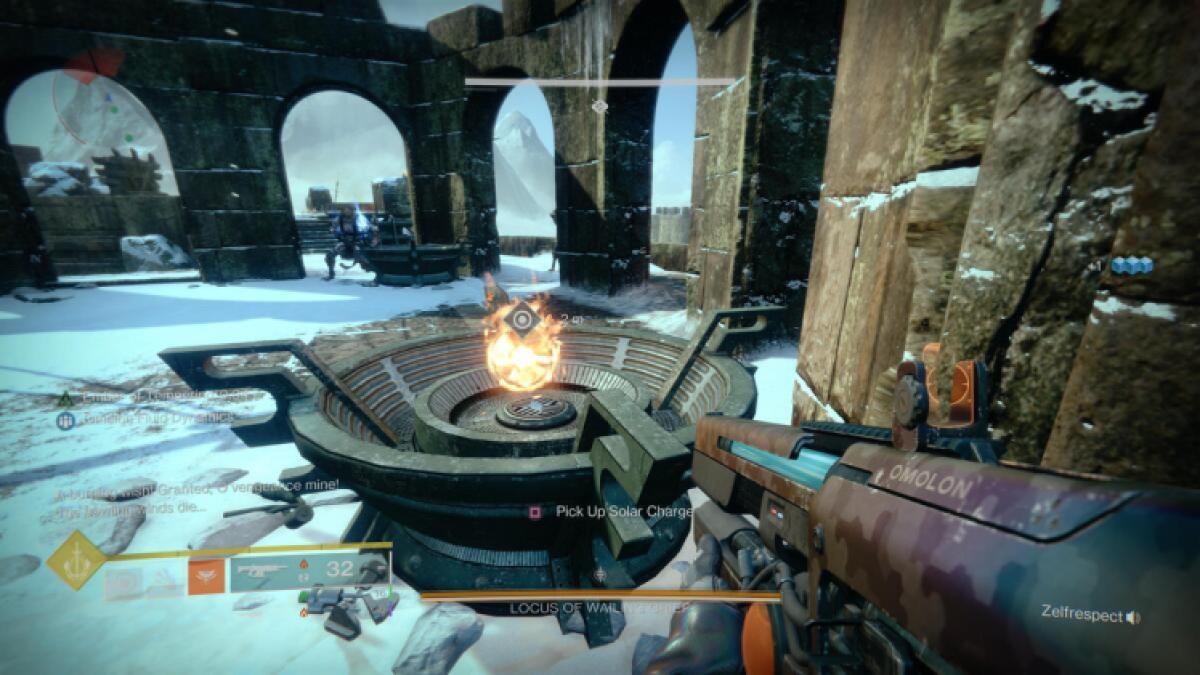

After destroying the black orbs in the Taken Totems and the Imminent Wish countdown ends, the Biting Cold debuff will go away, and you’ll receive Solar Charges based on the number of Taken Totems you defeated. Pick up these charges and, after clearing some adds in the middle, dunk the Solar Charges into one of the four square braziers called Warming Flames. I recommend trying to acquire two Solar Charges per round to speed up the DPS phase.
During the DPS phase, you’ll need to communicate with your team to ensure everyone gathers at one of the Warming Fires in the front, as DPS can only be dealt within the circle around a lit Warming Fire.
Once the Warming Fire extinguishes, you’ll need to move to another one to continue dealing damage. My team found success using a specific sequence of Warming Fires for DPS.
After the DPS phase, the process starts anew, beginning with the Blighted Eyes. It’s a lengthy process, but with the right strategy and cooperation, you can emerge victorious.
As a final pro tip, utilizing specific Super abilities can greatly aid your Fireteam in eliminating adds and dealing damage to the boss. Good luck!
Other Destiny 2 articles